Glenn's
Astrophotography
![]()
![]()
![]()
![]()
![]()
![]()
The Wolflin observatory from start to finish (Click on photo and then click again for a full resolution image).
More descriptive text coming soon...
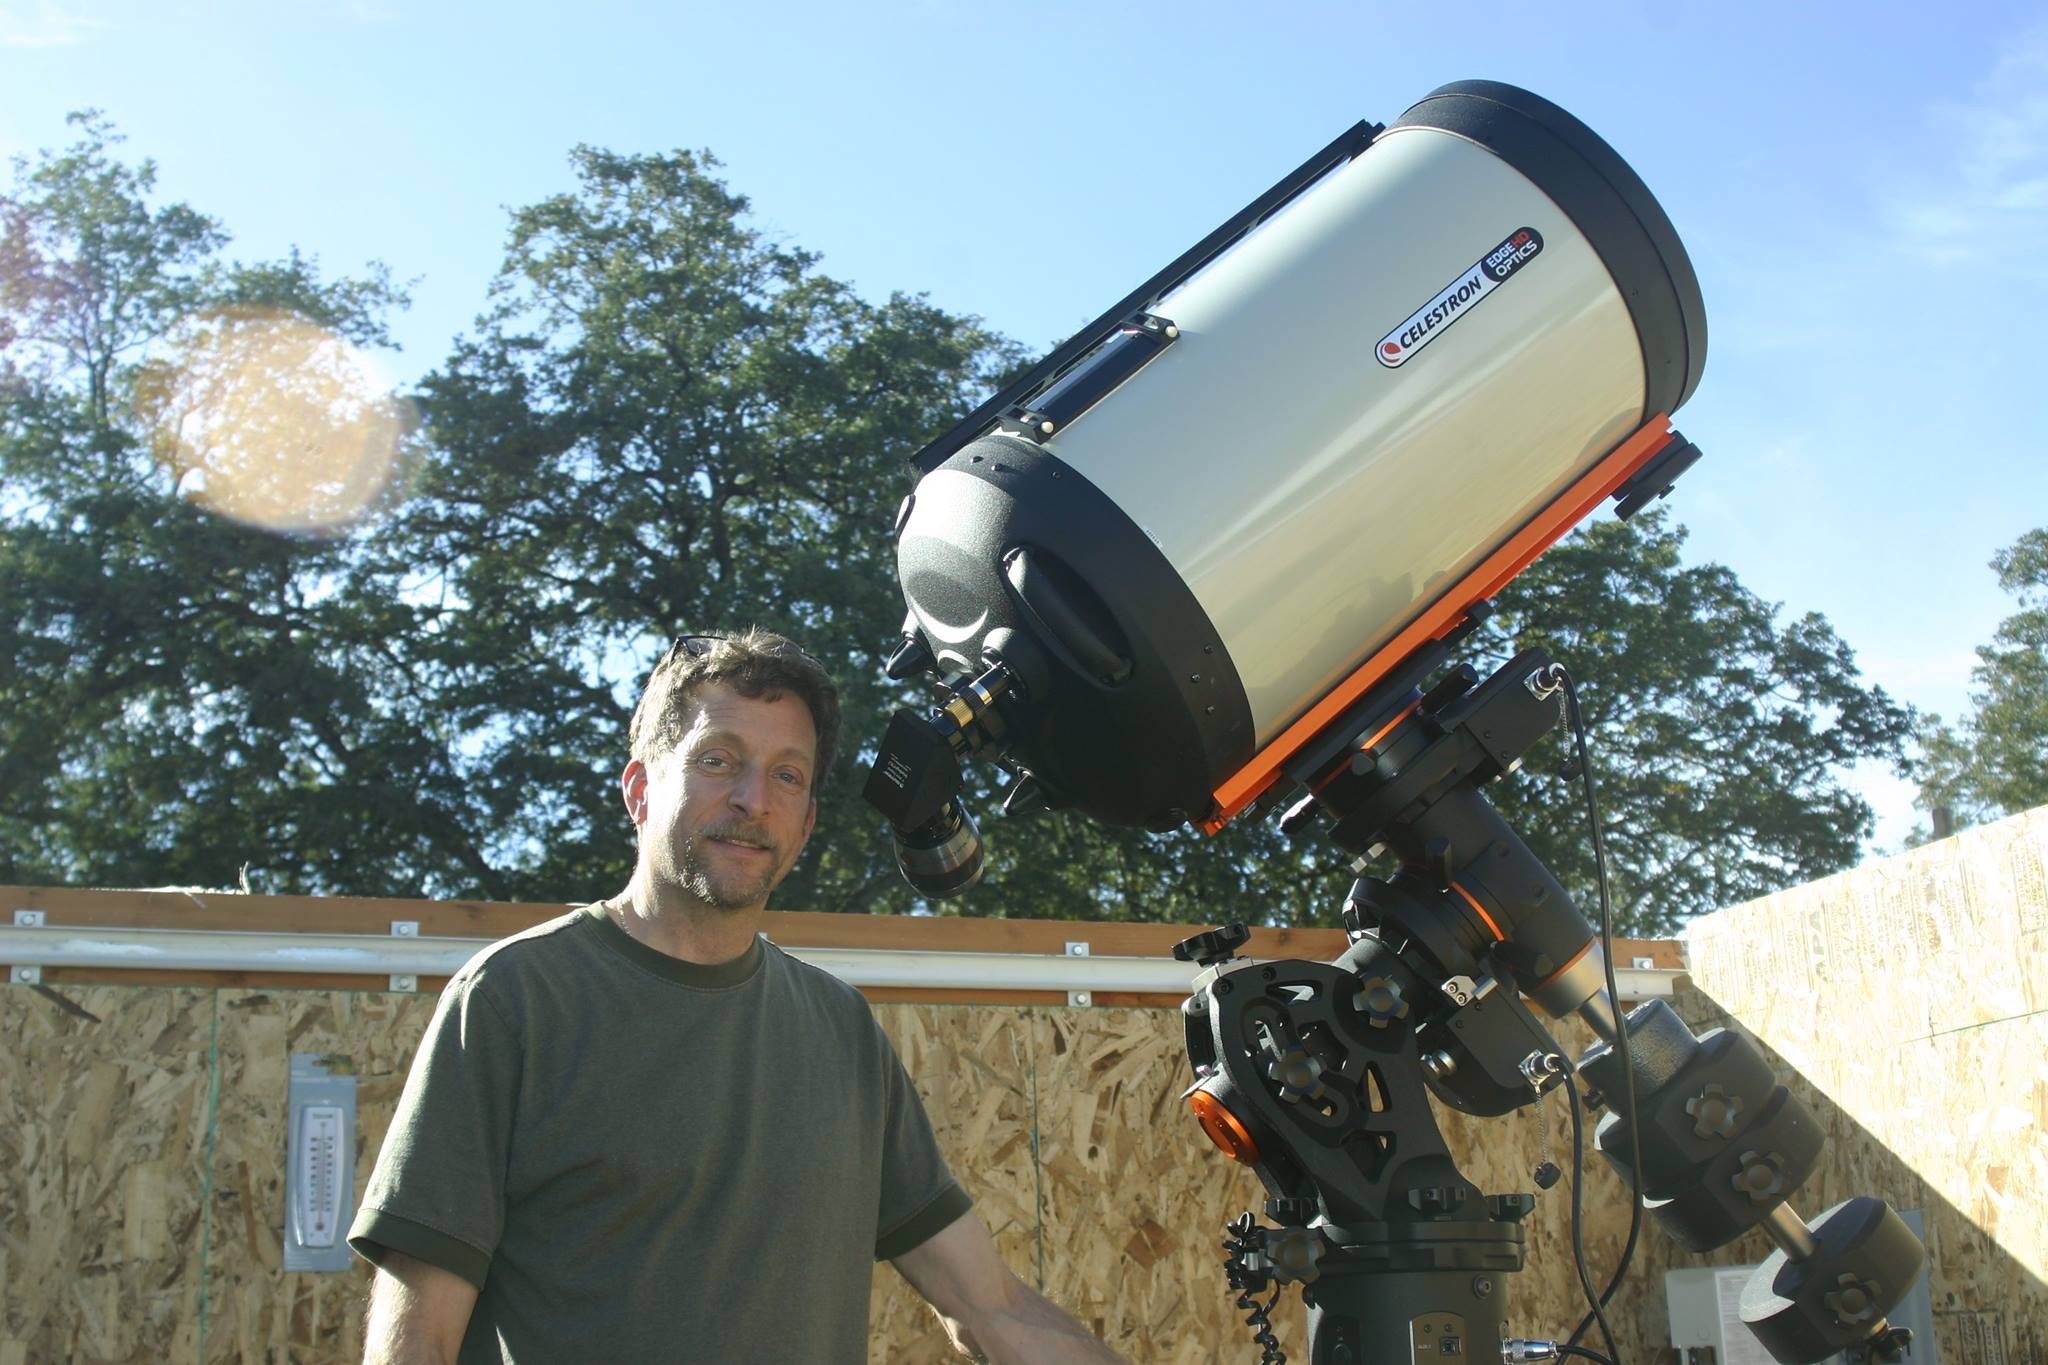 |
Posing with the primary imaging telescope in the Wolflin observatory |
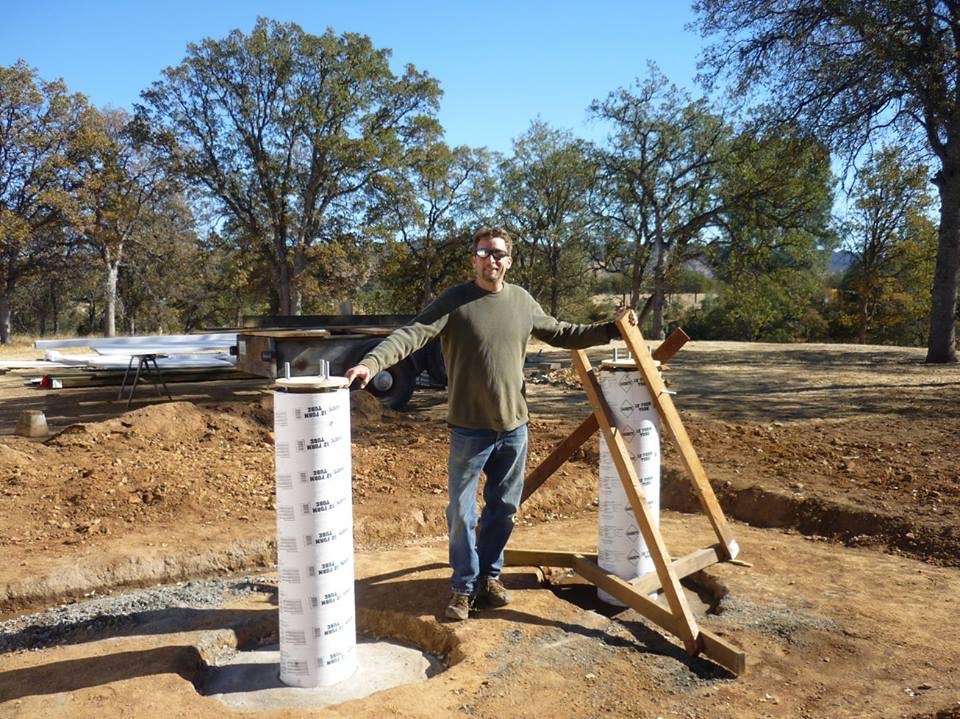 |
Taking a break after digging the observatory foundation, digging the two three-foot sqaure foundation holes for the concrete piers, and finally, pouring the concrete into the holes and into the pier tubes themselves while simultateously installing steel rebar rods.
|
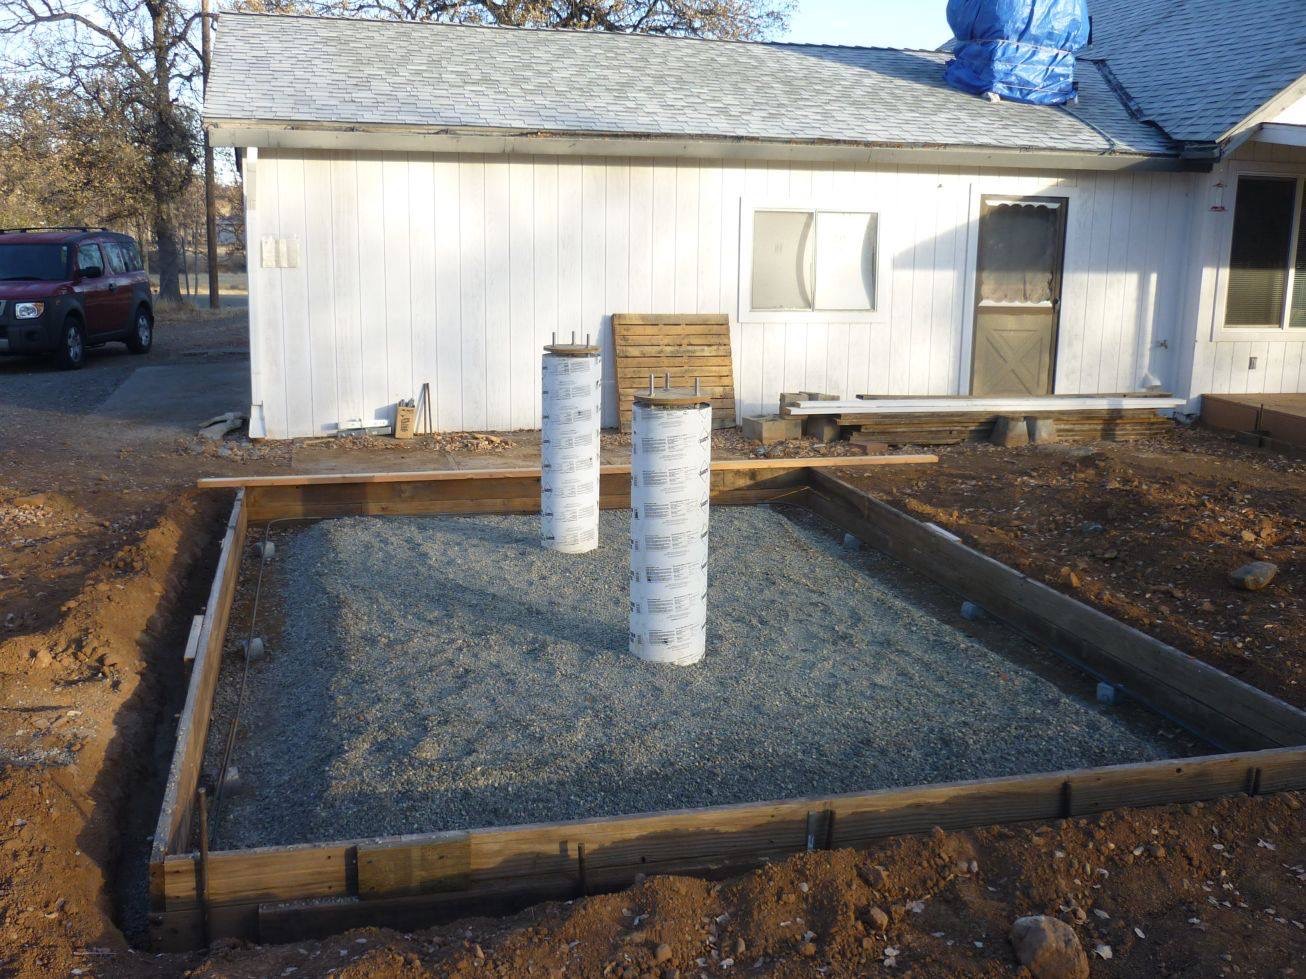 |
After completing the wooden foundation frame and pouring the gravel. Steel rebar would later be placed on top of the gravel prior to pouring in the cement foundation. |
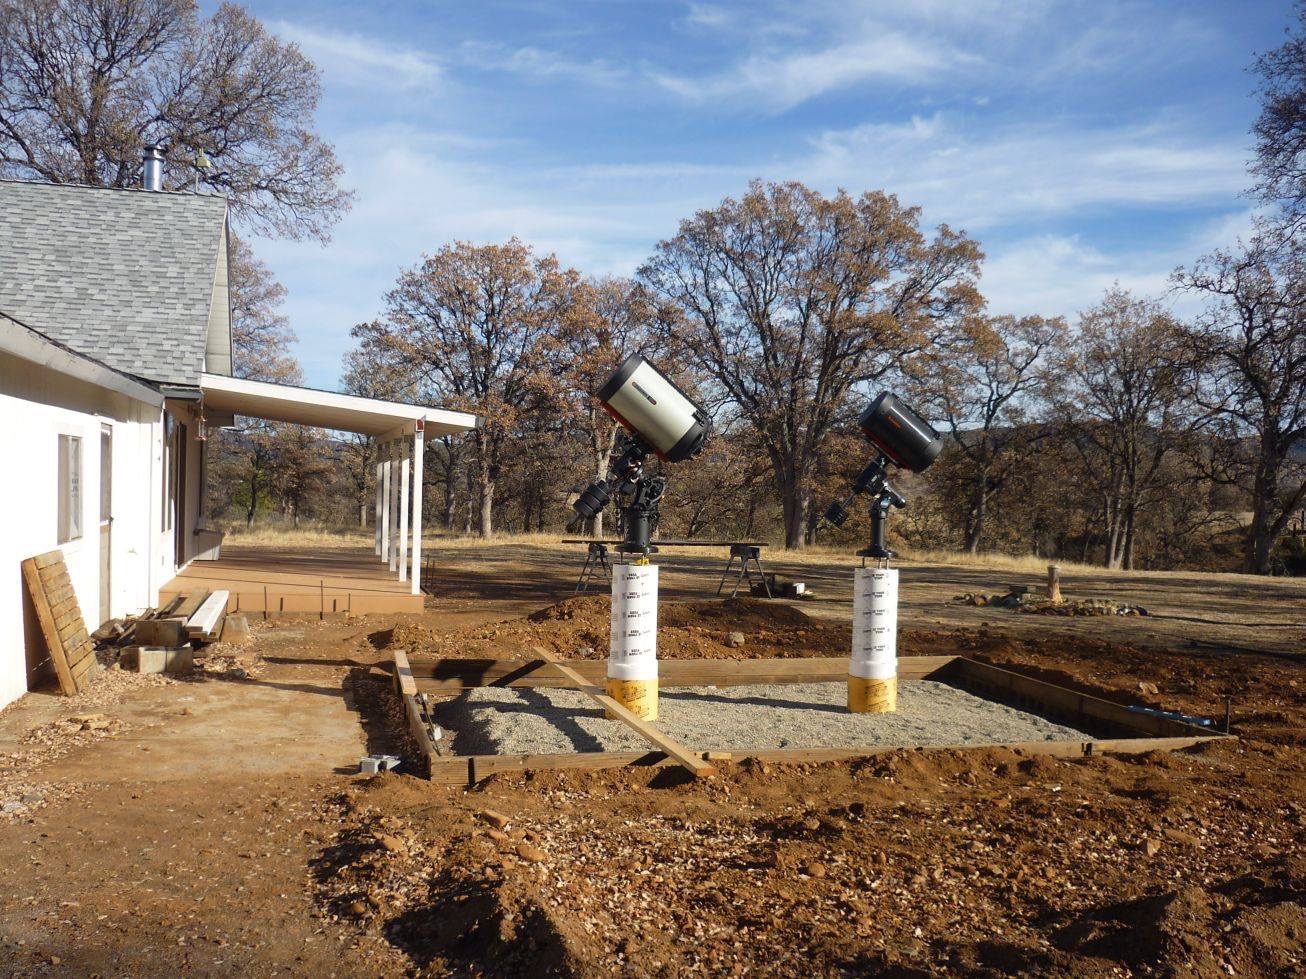 |
Temporarily installed telescope mounts on the piers for measurements. Foam padding (1/2 inch thick) was wrapped arround the bottom of each pier all the way down to the base. This was done to prevent the cement in the foundation when it is poured from making any contact with the cement piers. That will keep any vibrations created from any movements in the observatory from transferring to the piers and up into the telescopes themselves. |
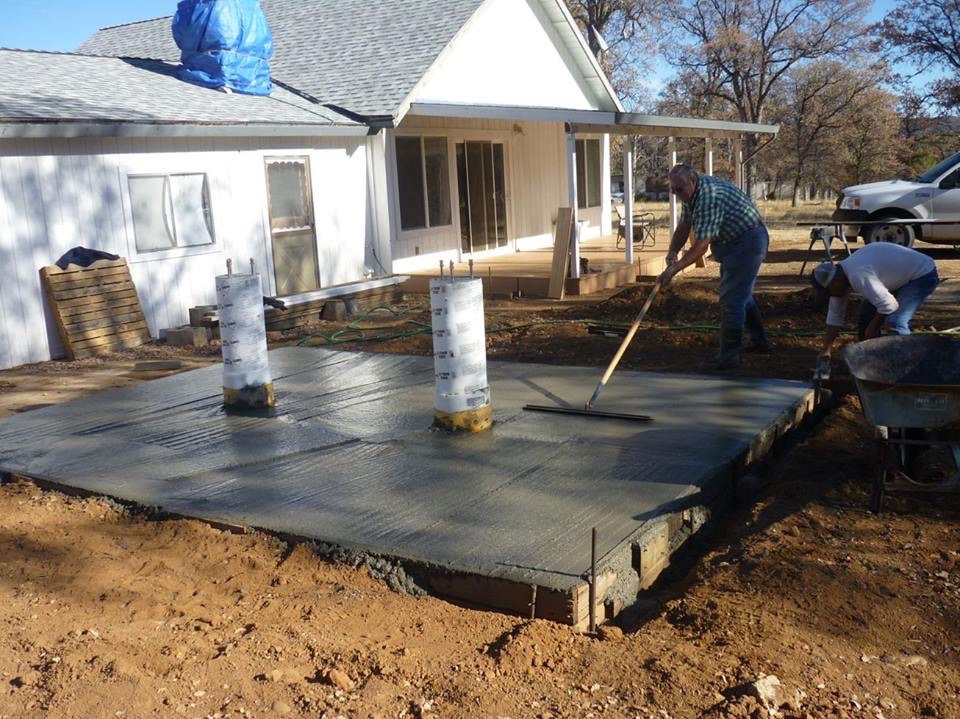 |
After pouring in the cement foundation and smoothing it out. |
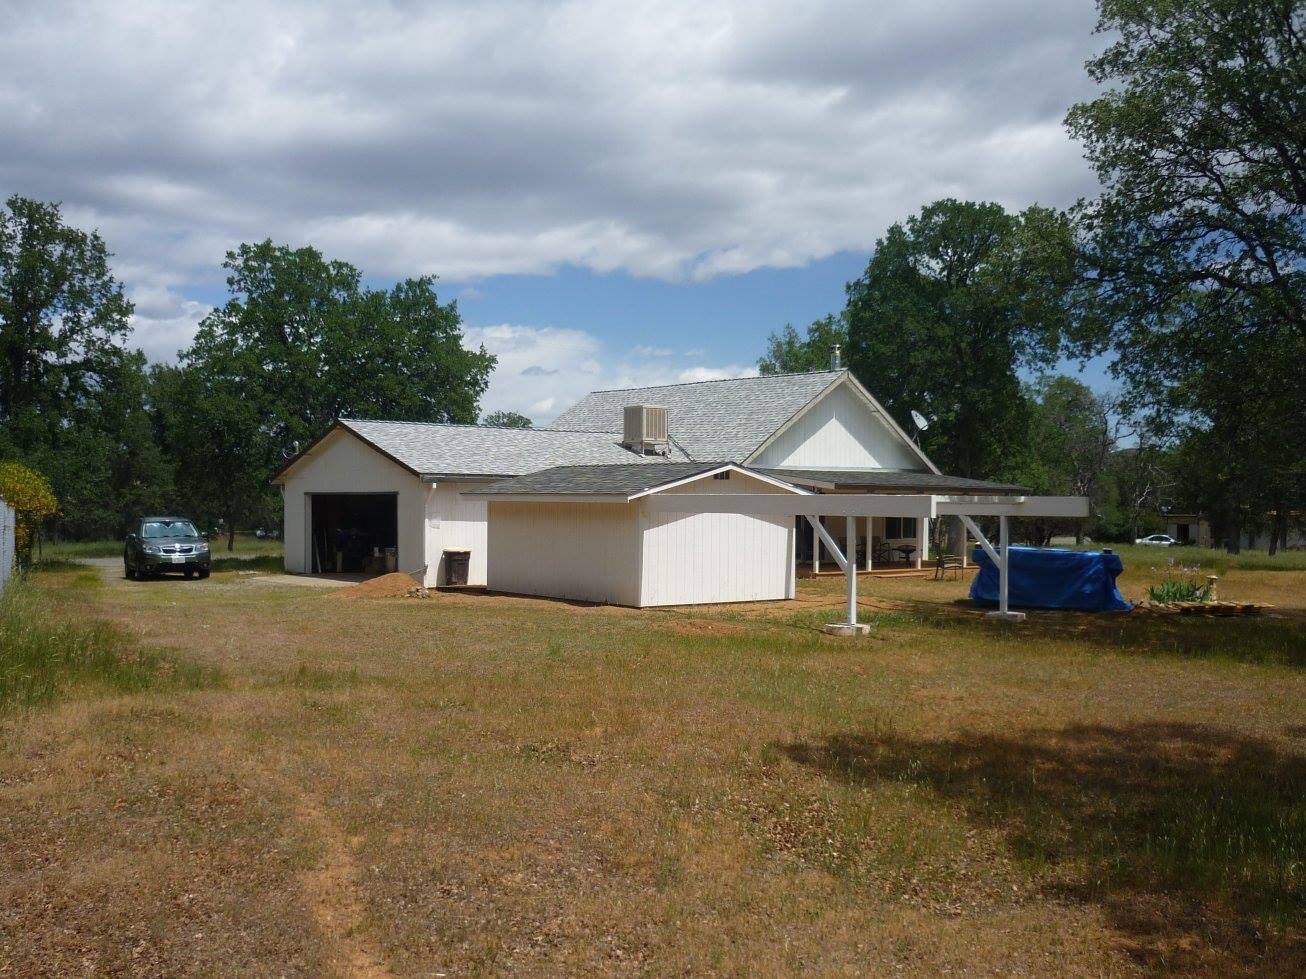 |
A view from the back yard of the observaotry and the house. |
 |
Opening the observatory roof onto the support beams. |
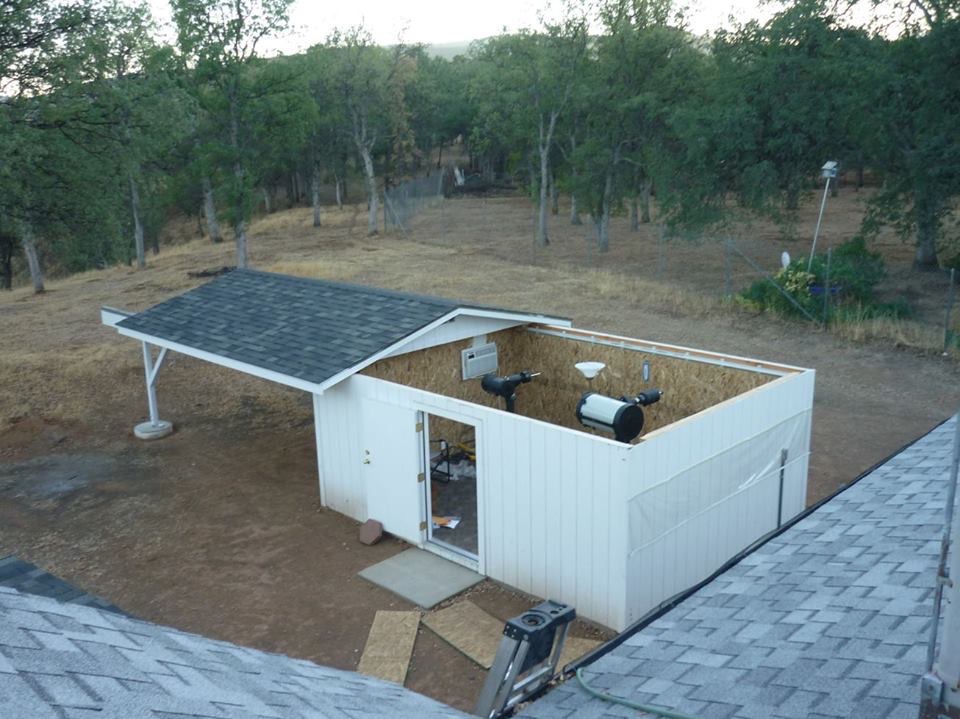 |
A view of the opened observatory from atop the house. |
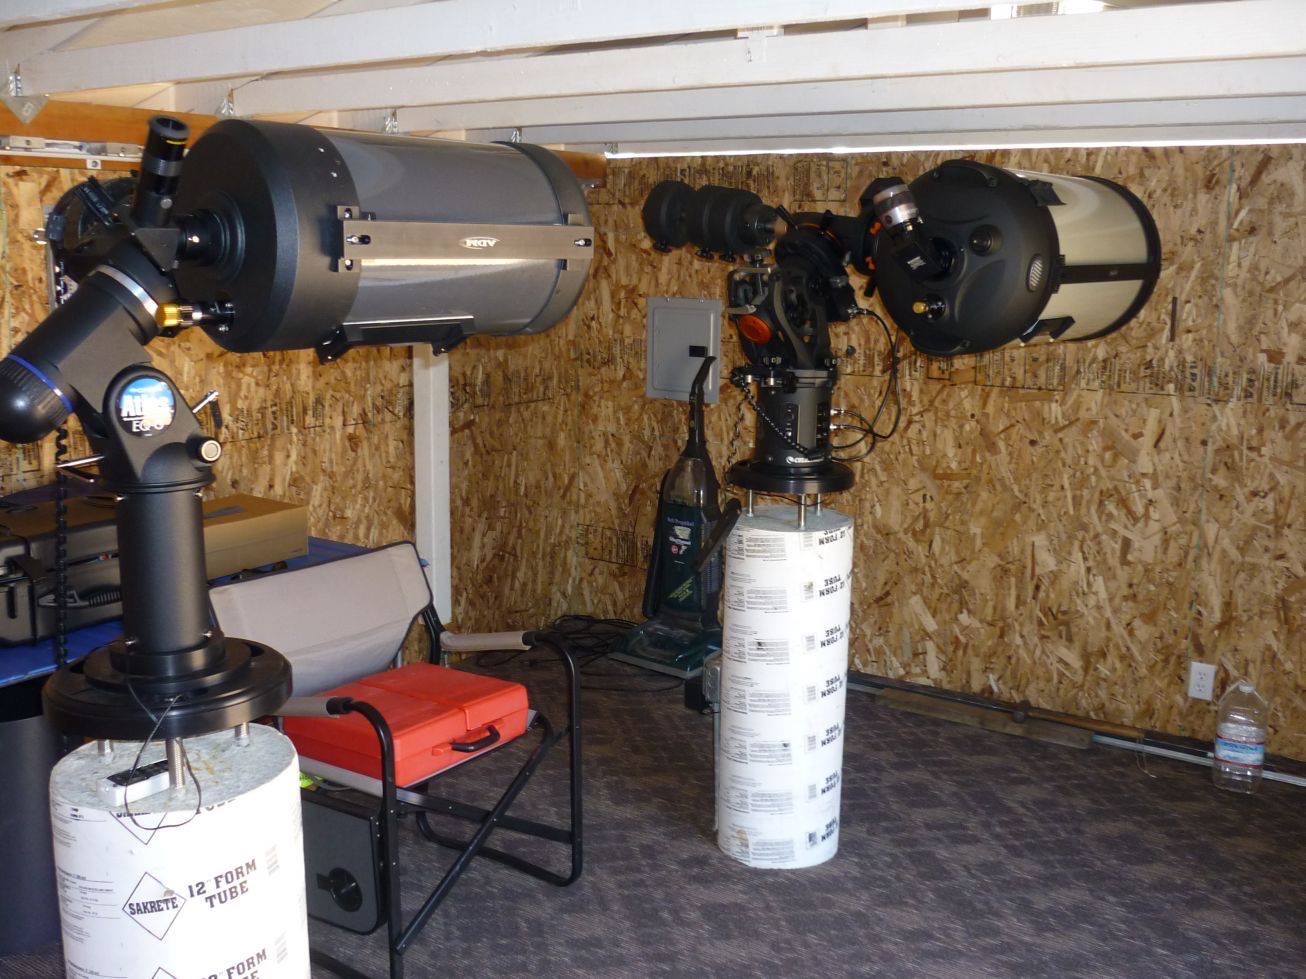 |
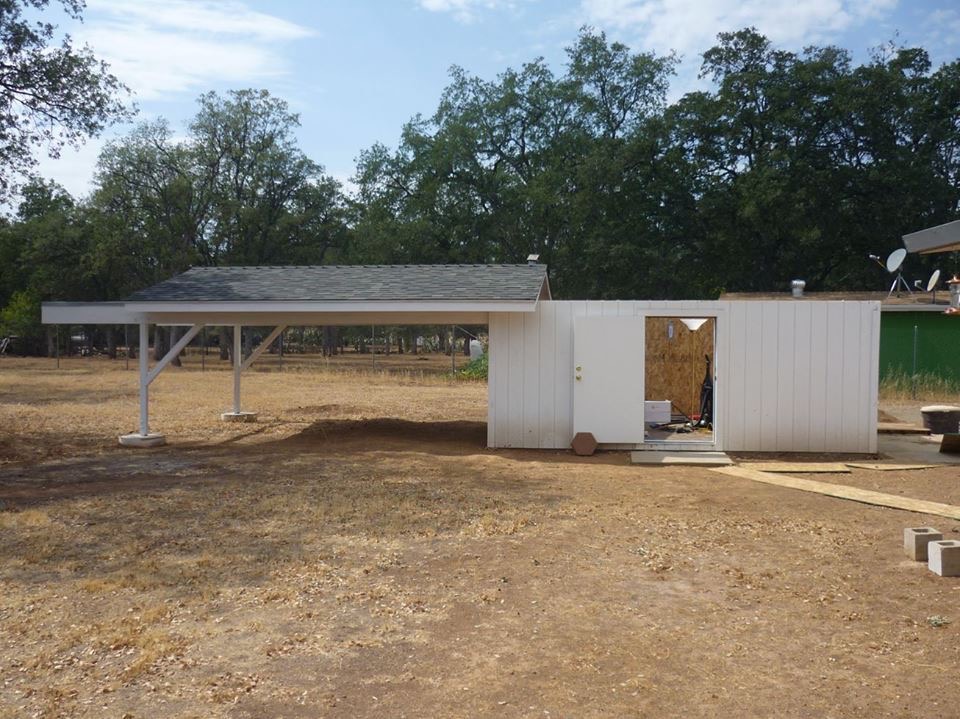
Telescopes in folded postion with observatory roof closed. |
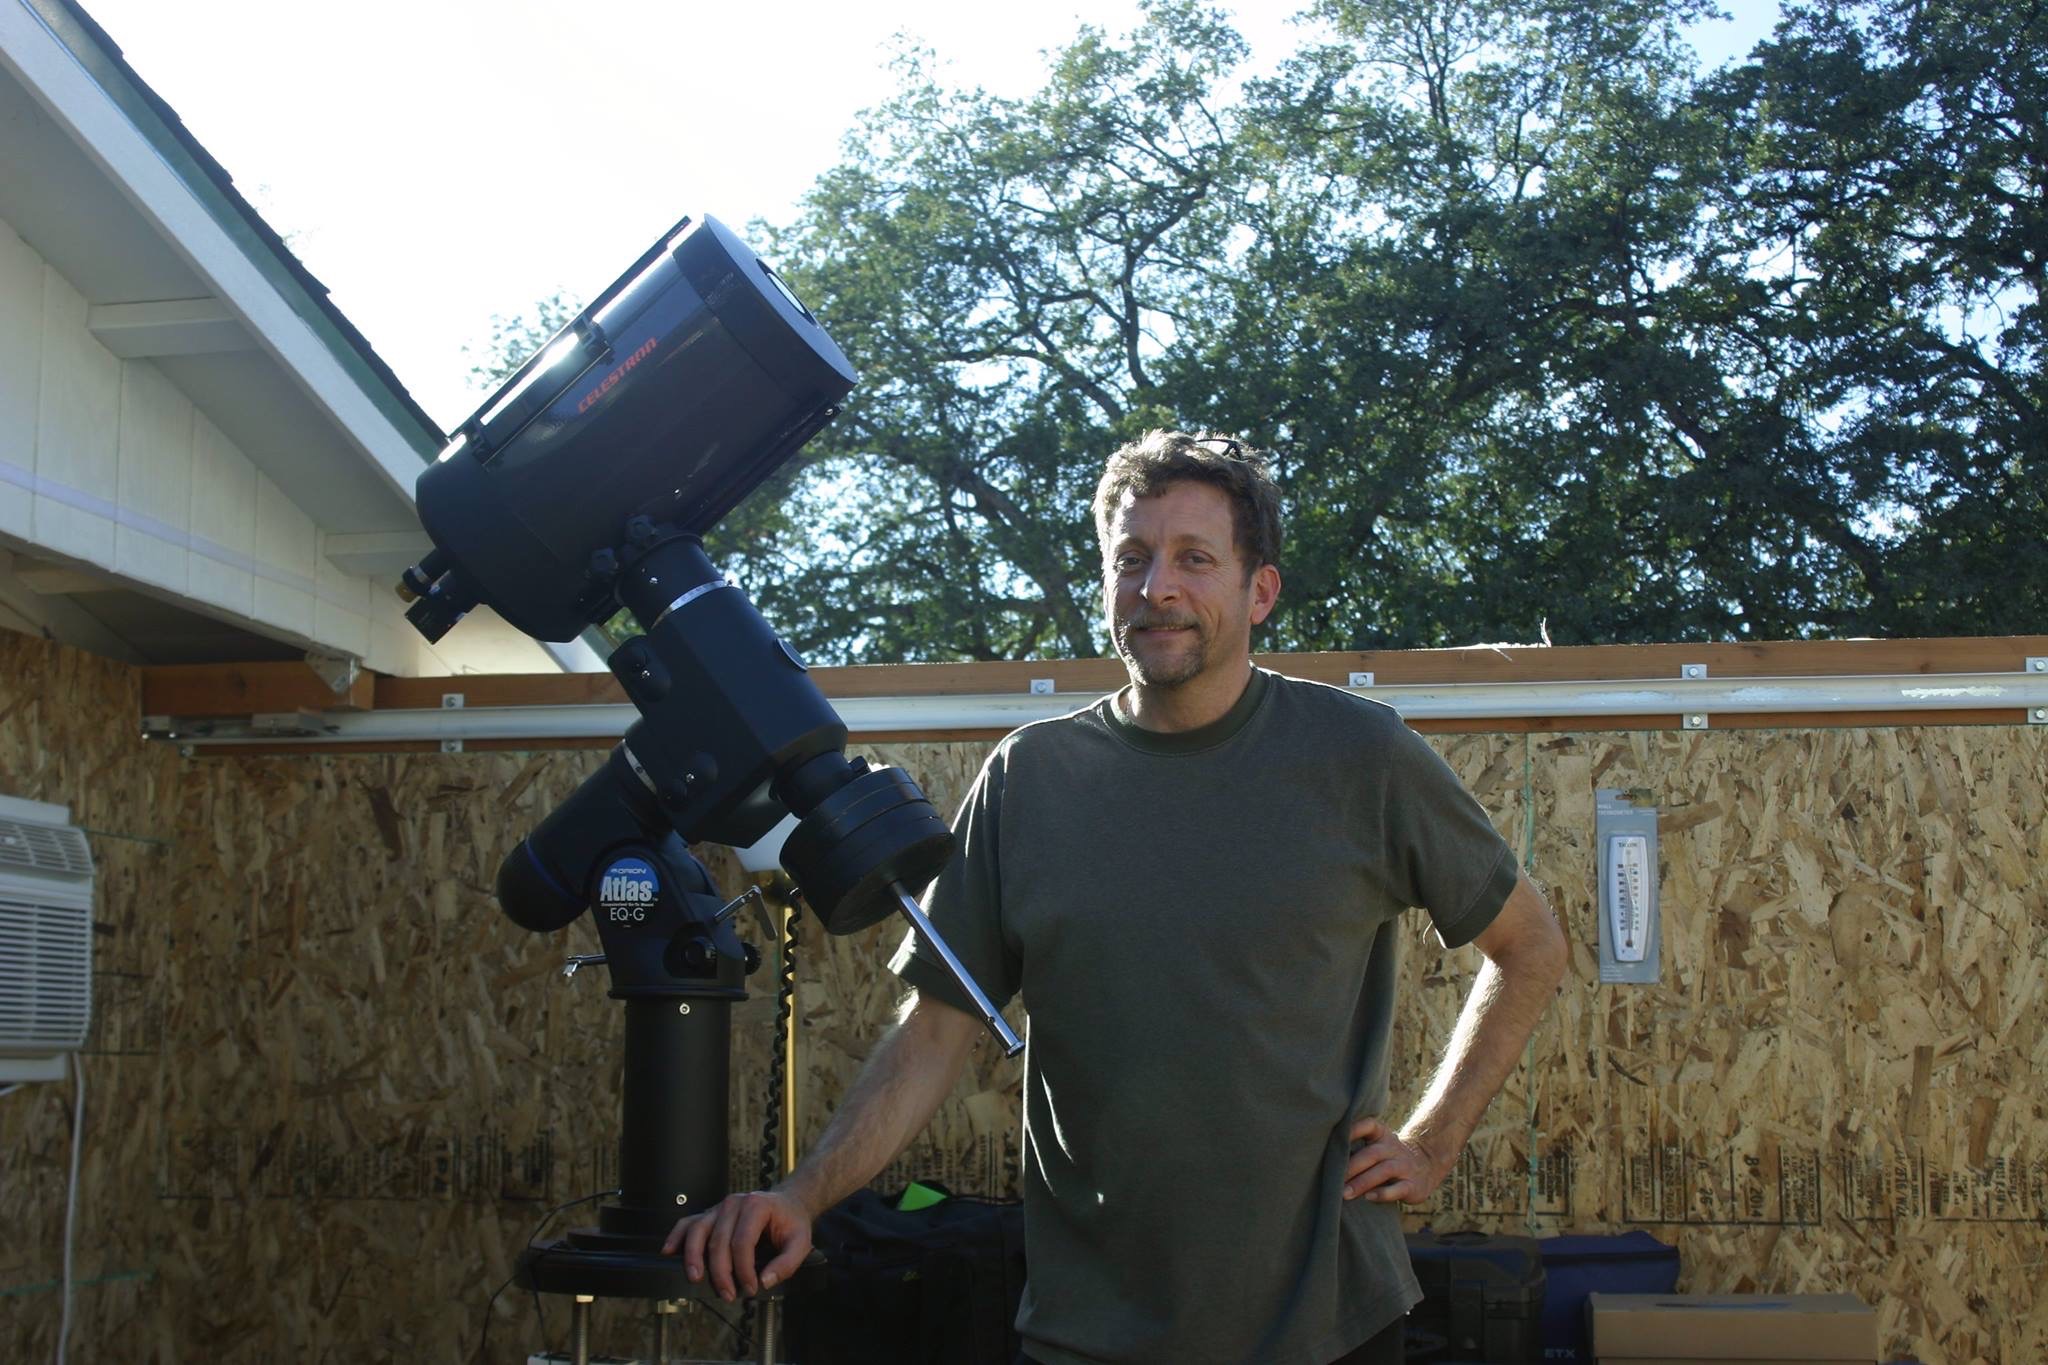 |
Posing by the secondary imaging telescope. Oh, and yes, that is indeed an A/C unit in the wall. It helps to cool down the telescopes in the summer more quickly, so that I can start imaging as soon as possible after dark. |
\\\